While maintaining sharp cutlery and spotless cookware often takes priority, that tacky buildup lurking inside your ventilation system silently destroys your kitchen’s airflow. Accumulated grime does more than just look terrible; it frequently triggers expensive mechanical failures or potentially dangerous flare-ups. Drawing from extensive appliance maintenance experience, I’ve put together this quick protocol to help you rejuvenate your ventilation unit rapidly without paying hefty repair bills.
Think of this fixture as crucial as your primary cooking range, simply because it actively extracts heavy airborne oils and lingering smells. Consequently, it traps layers of stubborn grime that solidify over time. Fortunately, restoring every single component is highly manageable using these cost-effective, thoroughly tested techniques.
Essential Supplies for Kitchen Hood Cleaning
Before diving into the actual scrubbing, gather your basic supplies. You likely already have most of these common household items tucked away in your pantry:
- A heavy-duty grease-cutting detergent.
- Standard white vinegar.
- Baking soda.
- A firm-bristled scrubbing brush.
- A gentle microfiber cloth or non-abrasive sponge.
- Steaming hot water.
Tackling Stubborn Interior Grease
Scrubbing the inner housing isn’t complicated, though it absolutely requires thoroughness. Since internal sticky residue tends to be incredibly resistant, utilizing a high-quality commercial degreaser is virtually mandatory for success. Always verify that your chosen spray is specifically formulated for stainless steel surfaces to prevent permanent clouding or discoloration.
Start by detaching the external metal meshes. Next, coat the inside cavity with a generous layer of degreaser and let the chemicals sit for several minutes to break down the grime. Finally, wipe the softened sludge away using your cloth. If your appliance has been neglected for an extended period, you will almost certainly need to apply a second round of cleaner to achieve a flawless finish.
Expert insight: If your ventilation system operates via recirculation rather than venting outdoors, you must inspect your active carbon filters. These specific components cannot be washed; instead, you need to swap them out every three to six months to guarantee optimal odor neutralization.
Degreasing the Internal Motor Safely
Addressing the mechanical components might seem intimidating, yet a remarkably straightforward trick handles the heavy lifting. Grab two large pots, fill them with water, and mix in a generous amount of baking soda. Bring the pots to a rolling boil on your stove, and the moment thick vapor rises, switch your exhaust fan to its maximum extraction setting.
Allow this alkaline steam treatment to circulate for a full sixty minutes. Keep an eye on the pots, adding more water and powder as the liquid continuously boils away. You will quickly notice the trapped oils inside the machinery softening and slowly dripping downward. Once finished, turn off the burners, cover your stovetop with absorbent paper towels, and easily wipe away the liquefied debris that has accumulated below.
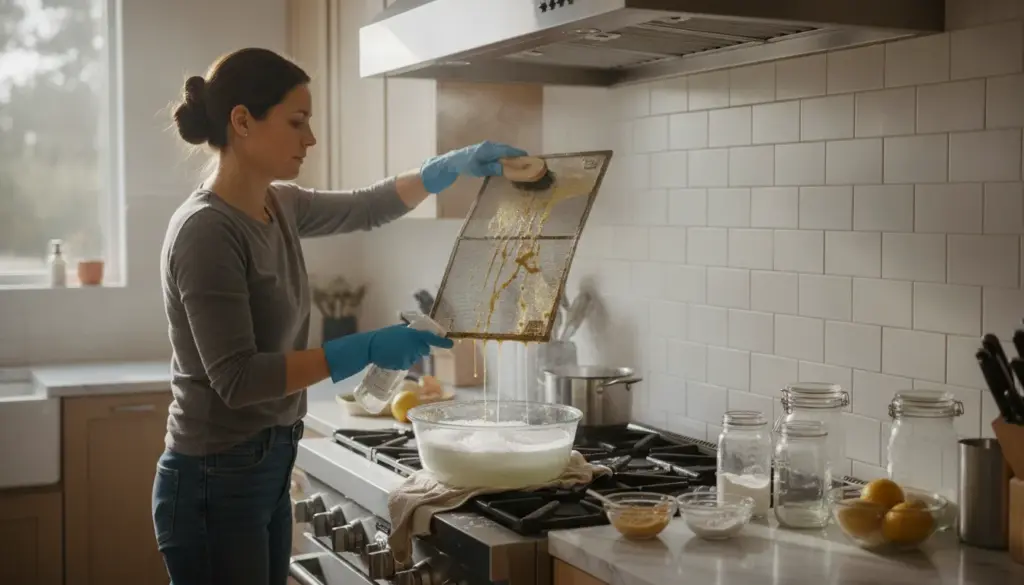
Reviving Metal Extraction Filters
Running the metal baffles through a standard dishwasher cycle remains my top recommendation, though a highly effective manual washing method exists if you prefer hands-on cleaning. Fill a large basin with scalding hot water and pour in a substantial dose of grease-fighting liquid.
Completely submerge the metallic grids for a minimum of ten minutes. Once the hardened buildup loosens, wipe the flat areas with a sponge and tackle tight corners with your stiff brush. The final result will yield impeccably clean, factory-fresh panels.
Polishing the Outer Canopy
Refreshing the exterior chassis is typically the fastest phase since external dirt buildup remains minimal. Grab a dedicated stainless steel polish, but exercise extreme caution to never spray liquid directly onto control panels or digital screens, as trapped moisture easily triggers electrical shorts.
Instead, apply the product to a soft rag and wipe the metal casing while strictly following the original grain direction. This specific wiping technique guarantees a brilliant, streak-free metallic shine.
Alternative DIY Cleaning Solutions
If traditional detergents aren’t your preference, several trusted household pantry staples deliver exceptional degreasing power:
- The Vinegar and Baking Soda Combo: Blend these two ingredients together to form a thick, spreadable paste. Coat heavily soiled areas, allow it to react briefly, and wipe clean. It acts as a phenomenal, all-natural grime destroyer.
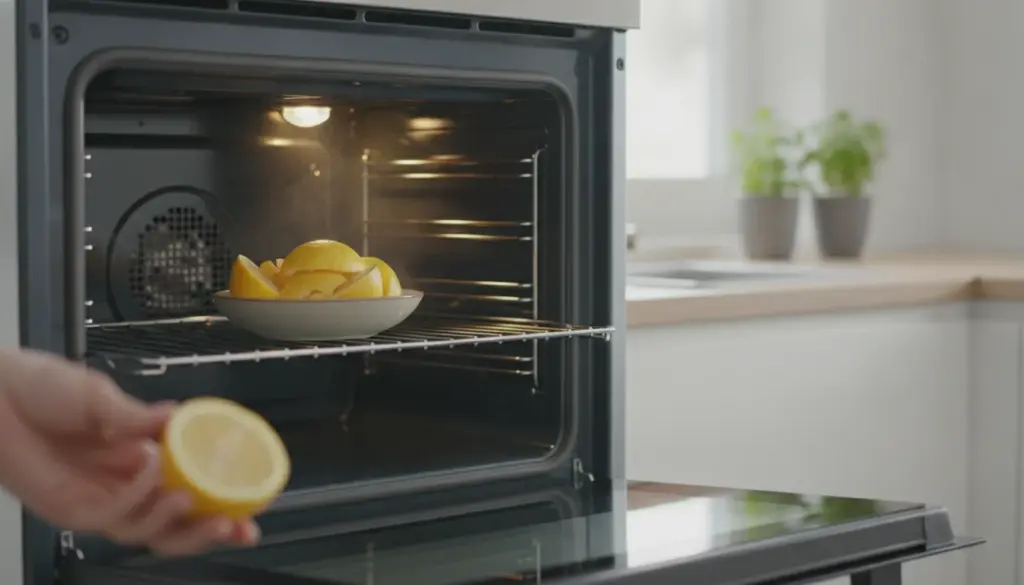
- Fresh Lemon: Natural citric acids are brilliant at breaking apart heavy oils. Vigorously rub a halved citrus fruit directly over sticky patches, wait a few minutes, and wipe with a damp cloth. A fantastic bonus is the crisp, refreshing fragrance left behind.
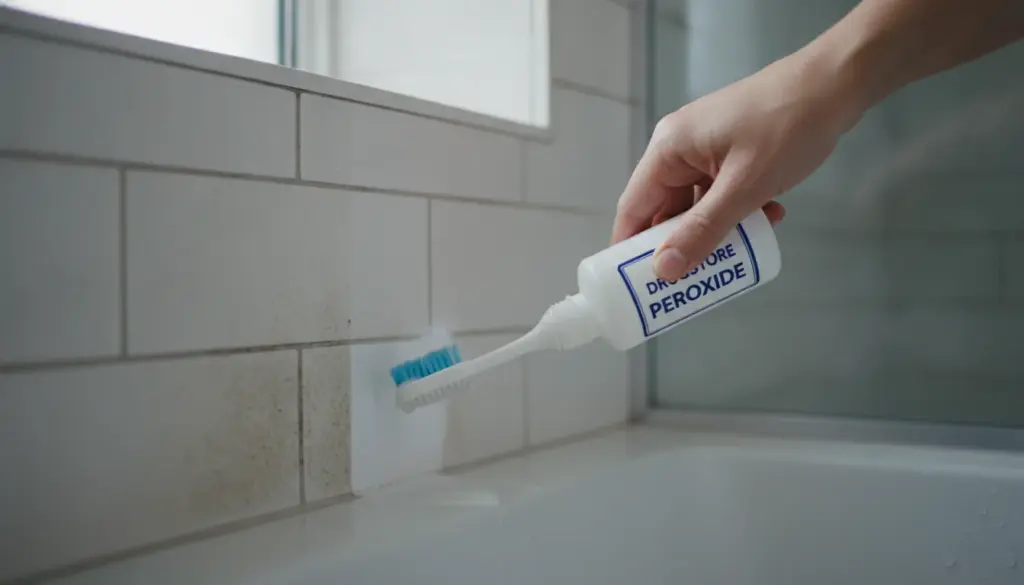
- Baking Soda and Hydrogen Peroxide: Mixing these liquids creates a surprisingly aggressive scrubbing paste. Smear it directly onto your most stubborn, baked-on stains, agitate lightly with a brush, and rinse thoroughly with warm water.
Always remember to spot-test any unfamiliar cleaning mixture on a tiny, hidden section of your appliance first to ensure material compatibility. Incorporating these simple habits will help keep your cooking space immaculate. Bookmark this handy walkthrough so you have it ready for your next deep-cleaning session.