
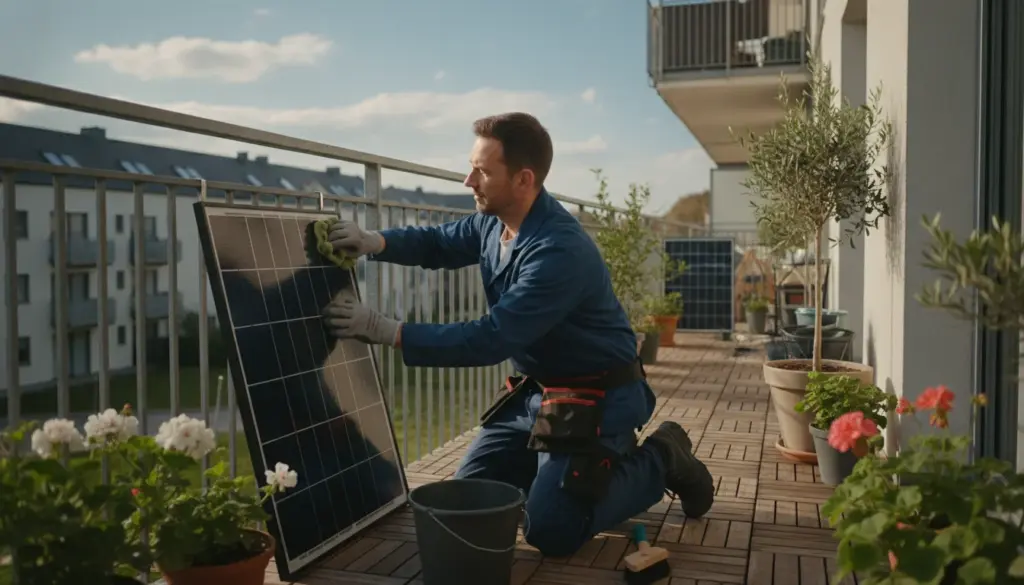
A brief spring inspection of your mini solar setup can easily save you a noticeable amount on your energy bill. With warmer weather approaching, peak season for facade and balcony solar systems is officially here. However, months of freezing temperatures, relentless wind, and heavy rain often leave these outdoor installations worse for wear. Taking just a little time right now for a targeted maintenance sweep ensures you enjoy maximum electricity generation and zero headaches for the remainder of the year.
Why Spring is the Perfect Time for a Maintenance Sweep
As daylight hours expand and solar intensity ramps up, your panels are primed to capture significantly more energy. While a balcony array might only offer symbolic contributions during the darker months, it can seamlessly offset a massive chunk of your household consumption throughout spring and summer.
That makes this the absolute best moment to systematically evaluate your setup. Harsh winter storms have likely tugged at your wiring, plugs, and mounting hardware. Furthermore, emerging foliage, freshly opened patio umbrellas, and newly hung outdoor laundry racks can introduce unexpected shading. Running through a focused five-point evaluation prepares your equipment for optimal seasonal performance. In fact, dedicating just a single hour to this routine checkup often yields better results than haphazardly slapping an extra panel onto your railing.
1. The Essential Safety Check: Is Everything Secure?
Start your evaluation with a thorough visual walkthrough of the entire setup. Safety should always be your top priority, especially when dealing with elevated solar equipment and electrical connections situated dangerously close to living spaces.
- Mounting hardware: Carefully examine all brackets, rails, and clamps. Give the system a gentle push; absolutely nothing should wiggle or shift.
- Fasteners and bolts: Scan for any signs of corrosion, misaligned joints, or loose connections. Immediately tighten down any wobbly components.
- Wiring condition: Look out for brittle insulation, sharp kinks, or exposed metallic cores. Every single wire needs to remain flexible and perfectly insulated against the elements.
- Door and window feeds: If your cabling runs through a window frame or doorway, inspect those specific areas for severe flattening or hazardous sharp edges.
- Connectors: Verify that all plugs are completely dry, spotless, and pushed all the way in. Watch out for any alarming brown scorch marks or melted plastic.
If you even slightly suspect a component is compromised, swap it out immediately. Slapping some electrical tape over a split cord might seem like a clever quick fix, but it creates a serious fire and shock hazard during heavy rain or peak electrical loads.
2. Positioning and Shading: Finding the Sweet Spot
Compact balcony solar arrays are surprisingly sensitive to partial shading. Just one blooming shrub or a neighbor’s brand-new awning can drastically plummet your energy harvest.
Spotting Fresh Shadow Sources
Pick a clear, sunny day and periodically step out onto your balcony to observe exactly where the shadows fall during the morning, midday, and late afternoon. Keep a keen eye out for:
- Sprouting branches, aggressive ivy, or rapidly growing potted plants.
- Recently installed fences, privacy screens, or patio covers next door.
- Bicycles, oversized planters, or drying racks positioned directly in front of your glass.
- Balcony railings that cast longer shadows as the sun climbs higher in the sky.
If you have the flexibility to shift your array slightly to the left, right, or up a few inches, you will often see an instant boost in wattage. Simply sliding the setup 10 to 12 inches is frequently all it takes to escape a frustrating shadow entirely.
Adjusting the Tilt Angle
While the winter sun sits quite low on the horizon, summer brings a much higher trajectory. The steep tilt that captured those scarce December rays is far less effective once May rolls around. Many homeowners just leave their brackets in a fixed position year-round, completely missing out on the extra kilowatt-hours a flatter spring angle provides.
If your mounting frame allows for angle adjustments, experiment with flattening the slope as the season progresses. If your mounts are strictly stationary, direct all your energy into keeping the glass perfectly shade-free. A pristine, unshaded fixed system will effortlessly outperform an adjustable unit hiding behind a potted fern.
3. A Gentle Spring Clean: Banishing Winter Grime
Photovoltaic cells reach their maximum potential only when unimpeded sunlight hits the tempered glass. Over the chilly months, a stubborn film of atmospheric dirt, fireplace soot, bird droppings, and early spring pollen inevitably builds up. This subtle, hazy layer acts like a sunblock, severely throttling your electrical output.
You do not need a fancy cleaning kit to refresh your system. Just grab:
- A standard bucket filled with lukewarm tap water.
- A non-abrasive, lint-free microfiber cloth or a soft sponge.
- An optional rubber squeegee to gently glide away excess moisture.
Carefully wet down the glass and wipe away the accumulated muck using long, smooth strokes. Resist the urge to scrub aggressively; while the front glass is incredibly durable, the specialized anti-reflective coating can easily degrade under rough handling. Absolutely avoid using pressure washers, abrasive scouring pads, or harsh chemical detergents. The microscopic damage these cause will cost you far more in lost energy than you could ever gain back.
If you encounter concrete-like bird droppings, simply let a wet cloth sit on the spot for a few minutes to soften it up before wiping it away. Remember to practice common sense safety—never lean dangerously over a railing, and utilize a telescopic cleaning pole if necessary.
4. App Calibration: Is Your Tech Running Smart?
Most contemporary plug-and-play solar systems pair seamlessly with a dedicated smartphone application provided by the micro-inverter manufacturer. This digital dashboard is brilliant for more than just admiring aesthetic yield graphs; configuring the right parameters allows you to intelligently direct your household consumption.
Evaluating Core Software Settings
Launch your companion app and methodically review the internal preferences:
- Firmware updates: Check if a newer software version is available for your micro-inverter and install it immediately to patch bugs and boost efficiency.
- Maximum power output: Verify that your system’s output aligns perfectly with local grid regulations and the physical limitations of your hardware.
- Grid feed-in limits: Certain regions allow you to cap the exact amount of surplus electricity pushed back into the public network.
- Operational schedules: Adjust seasonal timer settings, especially if your ecosystem incorporates a compact battery storage unit.
If your setup features a small power bank or buffer battery, you can typically dictate whether the stored energy should stockpile for evening use or flow directly to your active appliances. During exceptionally bright days, optimizing for immediate self-consumption is the smartest financial move. This simply means scheduling power-hungry chores—like running the dishwasher or doing laundry—exactly when the sun is blazing.
5. Compliance Check: Are Your Registrations Up to Date?
The bureaucratic landscape surrounding micro-solar installations shifts with surprising frequency. Keeping your balcony array legally compliant generally boils down to maintaining safe electrical ties and ensuring your local utility grid has the correct administrative paperwork on file.
Did you spend the dark season tinkering with your residential grid? For instance, if you:
- Mounted an additional solar module to your railing.
- Upgraded to a higher-capacity micro-inverter.
- Increased your system’s overall peak wattage capability.
Then those hardware modifications must precisely match the details currently registered with your utility provider and regional grid operator. Take a moment to verify that your enhanced total capacity and wiring methods still comply with current residential guidelines. If you are unsure about the shifting legal parameters, reaching out to a certified electrician or your utility’s customer support desk will quickly clear up any confusion.
Homeowners who incrementally expand their mini power plants notoriously forget to update their official documentation. Overlooking this tedious administrative chore can trigger massive regulatory headaches during smart meter upgrades or localized grid outage troubleshooting.
Pro Tips for Maximizing Your Mini Solar Yield
Beyond checking off these five essential maintenance tasks, adopting a few clever daily habits can drastically inflate your energy savings without requiring a single technical tweak:
- Strategic appliance timing: Shift heavy-duty chores, such as vacuuming or running the clothes dryer, strictly to the sunniest parts of the afternoon.
- Slaying vampire draw: Hook up your ever-present entertainment consoles and home office gear to a centralized power strip with a physical shutoff switch.
- Utilizing smart plugs: Implement basic programmable timers for heavy electronics that absolutely do not require round-the-clock power, like a secondary garage refrigerator.
Consistently monitoring your application’s data charts over a full calendar year is an incredible way to master your unique generation curve. You will quickly memorize exactly which hours produce massive power spikes, allowing you to organically mold your daily routines around free, green electricity.
Decoding Crucial Solar Terminology
Navigating the world of balcony power plants often means dealing with a bit of industry jargon. Here is a quick breakdown of three core concepts every micro-generator needs to understand:
- Tilt angle: This refers to the specific slope between your glass panel and the flat ground below. A smaller angle means the unit sits flatter, while a larger angle points it steeper. Finding the right incline dictates how directly the solar radiation strikes the internal cells.
- Micro-inverter: This indispensable little box sits directly behind your panel, seamlessly transforming raw direct current (DC) into usable alternating current (AC). Without this crucial piece of hardware, your wall outlets cannot process the harvested sunlight.
- Self-consumption: This represents the exact fraction of generated electricity that your household actively burns through while it is being created. Maximizing these specific kilowatt-hours generally guarantees the fastest financial payback.
By grasping these fundamental mechanics and diligently performing this five-part spring maintenance routine, you can squeeze a genuinely astonishing return on investment out of a standard balcony rig. Not only will your wallet thank you, but you will also experience that undeniable rush of satisfaction when you watch your home energy meter virtually grind to a halt on a beautiful, cloudless afternoon.