The Secret to Grit-Free Seafood
Have you ever taken a bite of a highly anticipated seafood dish, only to encounter a terrible, gritty crunch? That profoundly unpleasant sensation can instantly ruin an otherwise elegant dinner. Fortunately, properly prepping your bivalves ensures a flawlessly smooth texture and pure oceanic flavor, completely free from nasty surprises.
Whether you are throwing together a quick seafood pasta or preparing a classic marinière, mastering this foundational stage is essential. Honestly, handling this at home is incredibly straightforward, provided you stick to established methods without attempting to cut corners. As a culinary enthusiast, I will walk you through exactly why these creatures harbor dirt, how to execute a flawless depuration process, and which common pitfalls to dodge for a restaurant-quality result.
Why Shellfish Harbor So Much Grit
Bivalves survive by constantly filtering the water immediately surrounding them. Because they naturally burrow deep into sandy ocean floors, they inevitably draw in microscopic sediment and environmental debris while feeding. They unknowingly hold onto these tiny particles inside their protective shells.
When you bring home fresh catches, particularly straight from a traditional fishmonger, expect them to carry a fair amount of impurities. Therefore, purging them prior to cooking is absolutely non-negotiable, regardless of whether the vendor insists they are completely pre-washed. Grit not only destroys the delicate structure of your meal, but it also creates a dreadful chewing experience that no amount of rich sauce or aggressive seasoning can mask.
Determining Which Varieties Require Purging
Not every type of marine delicacy demands the exact same preparation approach. Fresh, living specimens must always undergo a thorough cleaning process in your kitchen. Consider this an unbreakable culinary law.
Conversely, canned, pre-cooked, or commercially frozen varieties typically bypass this requirement since they have already undergone rigorous industrial washing. However, if you happen to purchase raw frozen batches, always scrutinize the packaging instructions. Keep this golden rule in mind: if the product you bought is raw and alive, a saltwater bath is mandatory.
The Traditional Step-by-Step Purging Technique
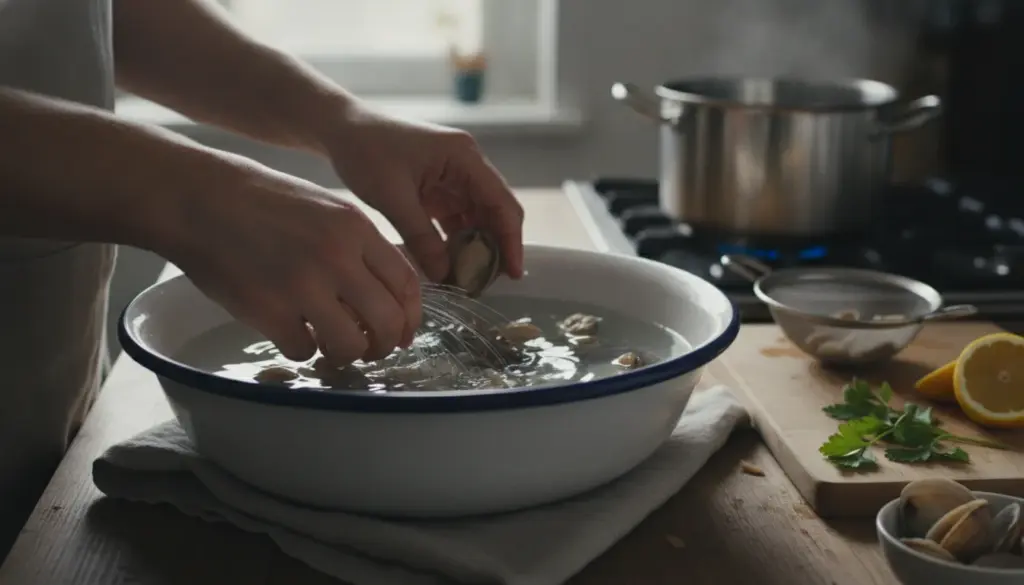
For generations, the most foolproof method has been a simple saltwater soak. This technique brilliantly mimics their natural oceanic habitat, encouraging the mollusks to relax, open up, and organically expel trapped debris.
Always initiate the process with a thorough dry visual inspection. Immediately discard any specimens possessing cracked shells, those that remain fully open when tapped, or anything emitting an offensive odor. A healthy, living creature will react to physical contact, which serves as your ultimate freshness guarantee.
Next, arrange them in a wide container so they aren’t stacked too heavily on top of one another, and submerge them entirely in cold water. You want to accurately replicate seawater salinity. The established sweet spot is typically 35 grams of sea salt per liter of water, which roughly equals one level tablespoon.
Pro Technique for Maximum Cleanliness
To prevent the shellfish from re-inhaling the expelled debris, place them in a colander resting inside your soaking bowl, or simply set an upside-down saucer at the bottom of the basin. This clever elevation allows the expelled grit to sink completely out of reach, keeping your seafood pristine.
Once submerged, it is vital to leave the container completely undisturbed. Let them rest peacefully for one to two hours in a chilly, preferably dark spot in your kitchen. During this window, they will pump out the impurities. Afterward, lift each piece out delicately to avoid stirring up the murky bottom layer. Pour that cloudy liquid straight down the drain—under no circumstances should you use it as a cooking broth!
How Many Times Should You Change the Water?
The necessary number of soaks heavily depends on the initial grubbiness of your catch. For varieties harvested from deeper, muddier beds, executing a second round with a fresh batch of salted water is highly recommended.
If you notice a thick layer of sediment sitting at the bottom after the initial bath, do not hesitate to repeat the procedure. Rushing the preparation phase is a terrible idea when handling delicate ocean fare. The more meticulous you are during the purging phase, the more flawless your final dish will become.
Choosing Between Tap and Bottled Water
Are you wondering which type of liquid yields the best results? Standard tap water usually works perfectly fine, provided it lacks a strong, harsh chlorine scent. Should you live in an area with exceptionally hard or heavily treated municipal supplies, opting for chilled, uncarbonated bottled water is a much safer bet.
The most crucial factor here is temperature; the bath must be ice-cold. Tepid or lukewarm temperatures can prematurely kill the animals, causing them to tightly clamp shut and permanently trap the debris inside.
Debunking Common Kitchen Myths
A quick internet search will yield countless miraculous hacks suggesting you dump vinegar, lemon juice, or even flour into the soaking bowl. Truthfully, the vast majority of these gimmicks are incredibly harmful and will likely kill your catch before it ever reaches the pan.
The only scientifically sound approach relies entirely on patience, frigid temperatures, and proper salinity. You truly do not need anything else for success. If you happen to be cooking during a sweltering summer afternoon, simply stash the soaking vessel in your refrigerator to effortlessly maintain that essential chill.
Verifying the Cleanliness of Your Catch
Once the bathing period concludes, the exterior shells should look visibly polished. Even so, I always strongly recommend swiftly rinsing every individual piece under running tap water. This final wash knocks away any lingering residue desperately clinging to the outer ridges.
If you still detect an unwelcome crunch after serving, a specific misstep likely occurred. The usual culprits include an excessively brief soaking time, inadequate salinity, or aggressively agitating the dirty water while transferring the food to the cooking pot.
Handling Stubborn, Unopened Shells
Encountering closed shells post-cooking is a standard culinary dilemma. However, the safety guideline here is absolute and unwavering: any specimen that refuses to yield to high heat must be immediately thrown away.
Never attempt to pry them apart with a knife. A tightly sealed post-cook shell almost certainly indicates the creature perished long before hitting the stove, making consumption a serious health hazard.
Proper Storage Protocols After Purging
Ideally, you want to fire up the stove and cook your bounty the moment it finishes soaking. If a delay is unavoidable, store the prepped batch in your refrigerator inside a bowl draped with a damp kitchen towel, but never exceed a 24-hour waiting period.
Under no circumstances should you leave them submerged or locked inside a completely airtight container. These are breathing organisms that require adequate airflow to survive until mealtime.
Tailoring the Wash for Specific Recipes
Whenever you are tackling a recipe where the natural briny juices meld directly into a pan sauce, extreme thoroughness is required. In these delicate culinary creations, a single speck of dirt will disperse throughout the entire skillet.
For any broth-heavy preparations, completing two full cycles of soaking is highly advisable. Even if it feels a bit excessive, that extra effort acts as the ultimate insurance policy for your palate.
Comparing Purging Methods Across Shellfish
This exact saltwater strategy applies beautifully to smaller bivalve variations, like cockles. Because they burrow significantly deeper, they might demand a few extra water rotations to achieve absolute perfection.
However, it is crucial to remember that black mussels require an entirely different approach. They do not need to sit and spit out internal dirt; they merely demand a vigorous exterior scrubbing and the swift removal of their fibrous, stringy beards.
Frequent Pitfalls to Avoid
Home cooks frequently sabotage their own meals by making a few easily avoidable mistakes:
- Under-seasoning the bath: The liquid needs a distinct, aggressive brininess, reminiscent of a gulp of actual seawater.
- Sheer impatience: Constantly hovering over the bowl and stirring the water disrupts their natural rhythm. Give them peace to do their job.
- Trusting labels blindly: Even if a package proudly boasts a “pre-washed” label, you should always run them through a home bath anyway.
Final Thoughts on Perfect Preparation
Executing a proper cleanse is a remarkably simple habit that drastically elevates the final plate. You do not require expensive culinary gadgets, just a small dose of patience and genuine respect for the ingredient. Treating your seafood with this level of care unlocks its absolute best qualities: unparalleled tenderness and a vivid, clean ocean essence.
Incorporate these crucial steps into your routine, and your homemade creations will effortlessly rival those served at high-end coastal bistros. Keep these specific salinity ratios committed to memory, ensuring your future aquatic feasts turn out perfectly every single time.