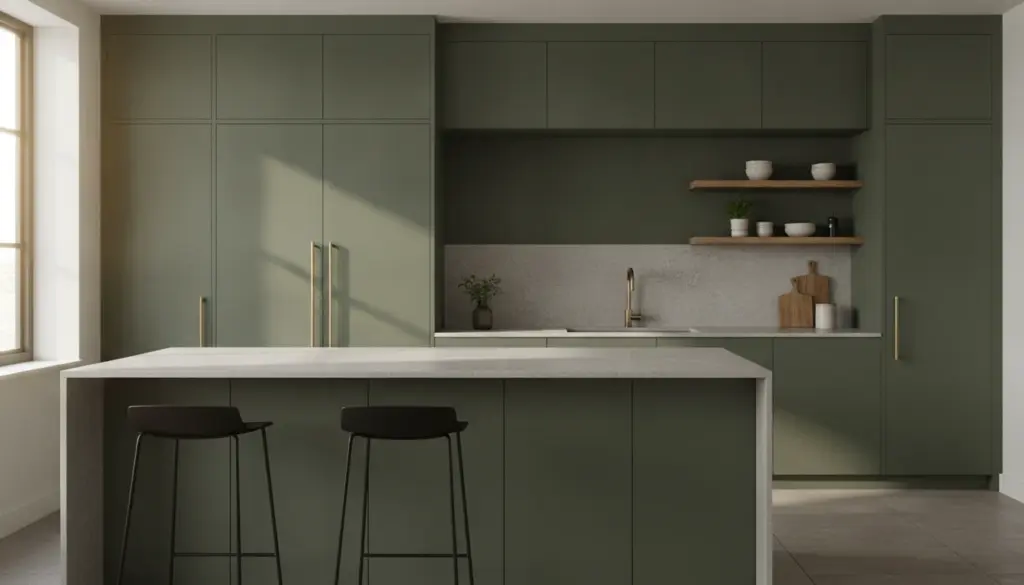
Do you find yourself staring at awkward gaps between cabinets and cluttered countertops, wishing for a seamless, architect-designed space? There is actually a highly effective workaround. You can transform a basic, off-the-shelf setup into what feels like a high-end, integrated culinary space without tearing down a single wall.
Why Standard Layouts Often Fall Flat
Many standard layouts function perfectly well but suffer from visual chaos. Floating cabinets, a protruding refrigerator, and exposed gadgets disrupt the eye. It ends up resembling a random assortment of furniture rather than a purposeful, unified concept.
The secret behind upscale interiors rarely lies in the brand of the appliances, but rather in architectural cohesion. When units sit flush, awkward voids vanish, and technology blends effortlessly into the background, the entire room elevates. You can replicate this bespoke aesthetic by eliminating the visual clutter that accidentally fragments your space.
Step 1: Erase Awkward Voids and Uneven Heights
Before grabbing your tools, take a step back. Snap a straight-on photo of your current setup to analyze it objectively. Pinpoint exactly where shadows pool in empty spaces, where heights mismatch, and which elements look disconnected.
Seal the Side Crevices
Those tiny vertical slivers of empty wall space next to tall units instantly give away a budget installation. By installing simple filler strips, you can trick the eye into seeing custom, wall-to-wall millwork.
- Measure the precise void bridging the end unit and the drywall.
- Have a lumberyard cut a piece of MDF or plywood to those exact dimensions.
- Secure the filler piece using construction adhesive or discreet screws.
- Finish with an exact color match to seamlessly blend it with your existing doors.
This single modification creates an incredibly convincing built-in aesthetic that rivals expensive renovations.
Bridge the Ceiling Gap
That dusty, unused cavern between your upper units and the ceiling casts dark shadows that cheapen the room. Visually closing this gap offers a massive upgrade without replacing a single cupboard.
Here are a few clever ways to close the void:
- Build a drywall bulkhead or fascia board right up to the ceiling, painted to match the cabinetry.
- Install a sleek horizontal panel that neatly caps off the top edge.
- Stack a row of identical storage boxes fitted tightly together to mimic upper-tier cabinetry.
Eliminating this vertical dead zone immediately makes the room feel taller, quieter, and noticeably more premium—a hallmark of contemporary new-build designs.
Incorporate Floor-to-Ceiling Columns
If you have a bulky, freestanding fridge or an empty corner, framing it in is a game-changer. Enclosing appliances within a tall, structured cabinet frame establishes a sophisticated appliance wall.
Visually, a continuous bank of tall storage adds far more perceived value to the room than splurging on a premium luxury countertop.
Step 2: Unify Cabinetry Fronts and Technology
Even the most budget-friendly materials can look incredibly chic when the geometry is harmonized. This is where you can achieve the highest return on your visual investment.
Elevate the Doors Without Replacing Them
While ordering brand-new fronts is always an option, a little creativity can completely alter the character of your existing ones:
- Apply thin molding directly to flat doors to create a classic panel silhouette.
- Attach vertical wooden slats to a kitchen island or select doors for a trendy, fluted texture.
- Drench everything in one uniform hue, ensuring you paint the exposed open side panels to match the doors.
Pay close attention to hardware alignment. Do your drawer seams run in a continuous line? Are the pulls installed at precisely the same height? Correcting these minor geometric inconsistencies brings a profound sense of calm to the space.
Camouflage Your Appliances
Exposed white goods chop up the visual flow. Whenever possible, force your appliances to blend into the background architecture.
- Panel your dishwasher so it masquerades as just another base unit, or build a housing for a freestanding fridge.
- Stack your oven and microwave vertically within a single tall column rather than scattering them across the room.
For smaller countertop gadgets, consider building an appliance garage. A simple cabinet with a pocket or drop-down door keeps toasters and coffee makers plugged in but completely out of sight. For renters dealing with an unusually cluttered corner, hanging a crisp, minimalist curtain or installing a lightweight sliding screen works wonders to hide the chaos.
Step 3: Curate the Hidden Interiors
High-end editorial spaces maintain their elegance even when you open a drawer. You can replicate this structural discipline without turning your life into a relentless styling project.
Establish Internal Architecture
True luxury means everything possesses a dedicated home. This approach streamlines your cooking routine while delivering a deep sense of visual satisfaction:
- Utilize deep drawer dividers specifically sized for heavy pots and their corresponding lids.
- Install angled tiered inserts to keep spice jars uniform and readable.
- Decant dry goods like pasta, grains, and cereals into a matching set of airtight canisters.
If you have open shelving, ruthless editing is mandatory. Stick to a highly restricted color palette—perhaps crisp white ceramics, clear glassware, a curated stack of cookbooks, and a single sculptural object. The moment random clutter accumulates, that bespoke illusion shatters.
Step 4: Leverage Lighting as an Architectural Tool
Illumination fundamentally alters how cheap or sophisticated a room feels. Professional showrooms utilize light strategically to guide the eye, and you can easily mimic these techniques at home.
Cast Continuous Ambient Glows
Running LED tape beneath your upper cabinets casts a smooth, uninterrupted wash of light across the work surface. This looks infinitely more modern than the harsh, localized glare of traditional spot fixtures.
Expert tip: Always select a warm-white color temperature, ideally between 2700K and 3000K. This softer spectrum flatters natural stone, wood grains, and painted finishes far better than sterile, cool-toned bulbs.
Highlight Display Niches
If you possess glass-front cabinets or open cubbies, installing a micro LED strip inside creates an instant boutique display effect. Just remember to reserve illuminated zones exclusively for beautiful objects, never for standard pantry overflow.
Float the Base Cabinets
A brilliant insider trick involves mounting lighting along the toe-kick or plinth board. This casts a gentle glow across the floor, creating the optical illusion that heavy cabinetry is weightlessly hovering. It introduces an incredibly serene, hotel-like ambiance, particularly during the evening.
The Psychology of the Bespoke Aesthetic
What does a custom build actually mean in practical terms? While true bespoke joinery is engineered to the exact centimeter of a room, you can convincingly fake it by manipulating volume, color, and light.
Human eyes naturally seek out rhythm—the repetition of shapes and lines—and are jarringly distracted by interruptions. A wall full of gaps and varying depths triggers visual stress. By connecting disparate elements through continuous panels or a monochromatic paint job, your brain registers the setup as a single, deliberate architectural feature.
Smart Solutions for Renters and Tight Budgets
Even if heavy construction is out of the question, temporary interventions carry massive impact:
- Use peel-and-stick LED strips that can be cleanly removed on moving day.
- Apply high-quality vinyl wrap or temporary paint to dated doors, provided your lease allows it.
- Position a narrow freestanding bookcase painted in the exact same shade next to your main units to extend the visual footprint.
- Utilize sleek storage boxes atop existing cupboards to fake the look of ceiling-height joinery.
By tackling these upgrades methodically—sealing the gaps first, harmonizing the facades next, and finishing with atmospheric lighting—your basic setup will gradually evolve. Soon enough, guests will start commenting on how incredibly expensive your kitchen looks, completely unaware of the smart, budget-friendly tricks hiding in plain sight.