The Secret Balance: Lemon Juice and Perfect Heat
Ever wonder why pan-seared white fish often turns into a dry, crumbly mess? The true secret to a flawlessly cooked meal has absolutely nothing to do with complex marinades. Instead, it all comes down to mastering moisture and heat control. By using a brilliant yet incredibly simple drying technique, you can whip up a restaurant-worthy dish in under 20 minutes while locking in mouthwatering flavor.
Cod is a wonderfully delicate, lean catch. However, if you treat it like a traditional beef steak, it will dry out in a flash. The biggest culinary misstep is drenching the fillets in citrus too early. Acid breaks down the protein structure, leaving your beautiful fish pale and unpleasantly rubbery.
For ultimate success, you need to sear the seafood almost entirely “dry.” The citrus is only introduced during the final cooking stage over a gentle flame, reducing into a highly aromatic glaze. To achieve this flawless balance for a dinner for two, gather these essentials:
- 350–400g of cod fillets (fresh or meticulously thawed)
- Juice from half a large lemon (save this strictly for the finish!)
- 2–3 tablespoons of extra virgin olive oil
- Flour (wheat or rice works beautifully for a crisp exterior)
- Fresh parsley, a garlic clove, salt, and black pepper
Smart Preparation: Steps to Take Before Turning on the Stove
Believe it or not, the “cold phase” determines at least half of your culinary triumph. Whenever utilizing frozen seafood, always let it thaw slowly in the refrigerator rather than rushing the process at room temperature or running it under warm water. Once fully softened, you must meticulously pat the fillets completely dry using paper towels. Eliminating surface moisture is the absolute best way to guarantee a gorgeous, golden crust.
Another game-changing step is applying a remarkably sheer dusting of flour. We are not aiming for a heavy batter here. Simply brush the meat lightly and vigorously shake off any excess. This micro-thin coating works magic by:
- Forming an irresistibly crispy protective barrier.
- Trapping those savory, natural juices deep inside the meat.
- Thickening the final pan sauce into a velvety delight.
Pro Kitchen Tip: Want to know if your pan is properly heated? Touch a tiny corner of the fillet to the metal surface. If you don’t hear an immediate, aggressive sizzle, your pan is too cold. The seafood will begin to release its own liquids, steaming itself rather than developing a proper sear.
Mastering the Skillet: Timing and That Citrus Finish
Select a heavy-bottomed skillet that provides plenty of room so the portions never overlap. Heat your olive oil gently alongside a smashed garlic clove. As soon as that rich garlic aroma hits your nose—but strictly before it begins to brown—scoop it out and discard it.
Carefully lay your portions down and absolutely resist the urge to move them for the first two to three minutes. The meat needs undisturbed time to naturally seal itself and release from the metal. Once the bottom edges transition to an opaque white, gently flip them over with a wide spatula. Generally, standard-thickness cuts require just three to four minutes per side over a medium flame.
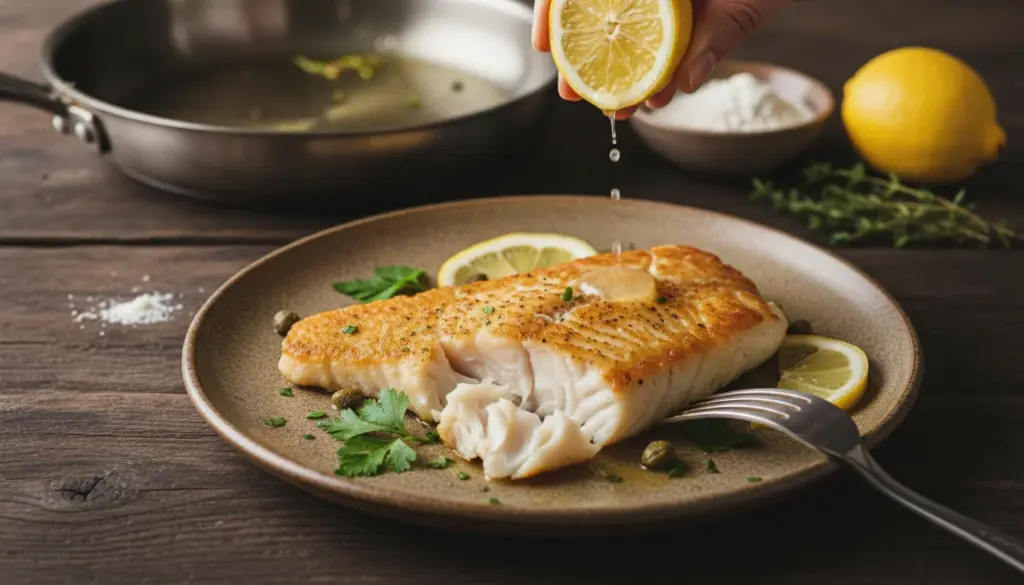
Just as the seafood finishes cooking, drop the heat to its absolute lowest setting. Pour your citrus juice directly onto the hot skillet edges, deliberately avoiding pouring it straight over the meat. Let the liquid bubble away for about sixty seconds while you spoon the reducing sauce over the top. This brilliant basting technique prevents “acid shock,” ensuring the fibers stay buttery and tender.
The Secret Touch: Perfect Seasoning Timing
When it comes to delicate seafood, you actually need to be quite strategic with your salt shaker. Salting too early draws internal moisture straight to the surface, completely ruining your chances of a satisfying crunch. For the best texture, wait to season until right after you make that first flip.
Save all your vibrant, fresh garnishes for the very end, right after pulling the pan off the burner. Top your masterpiece with:
- Finely minced fresh parsley leaves.
- Freshly grated lemon zest (sticking strictly to the yellow skin). This delivers a stunning aromatic punch without contributing any harsh tartness.
- A finishing drizzle of premium, raw extra virgin olive oil.
Serving Suggestions for a Flawless Plate
This pan-seared masterpiece is best enjoyed the second it leaves the stove. To soak up every drop of that incredible, zesty pan sauce, serve your dish alongside some classic boiled potatoes tossed with fresh dill. Alternatively, lightly steamed vegetables—like zucchini or spinach—make phenomenal, healthy pairings.
If you happen to have any leftovers, don’t let them go to waste! The following day, simply flake the cold fish apart and toss it with warm pasta, a splash of olive oil, and some roasted garlic for a lightning-fast, highly satisfying second meal.
Crucial Mistakes You Must Avoid
Most culinary disappointments usually stem from three easily avoidable blunders. First, cooking straight from the fridge is a major mistake, as ice-cold fillets immediately kill the heat of your cooking oil. Second, leaving the flame too high during the citrus deglaze will rapidly turn your beautiful pan sauce horribly bitter while toughening the meat.
Finally, always watch out for an overcrowded skillet. If the pieces are physically touching, they will end up steaming each other, making that coveted golden crust completely impossible to achieve.
By keeping these simple yet powerful rules in mind, you can consistently deliver a sensational, perfectly executed dinner that rivals the most exclusive coastal bistros.