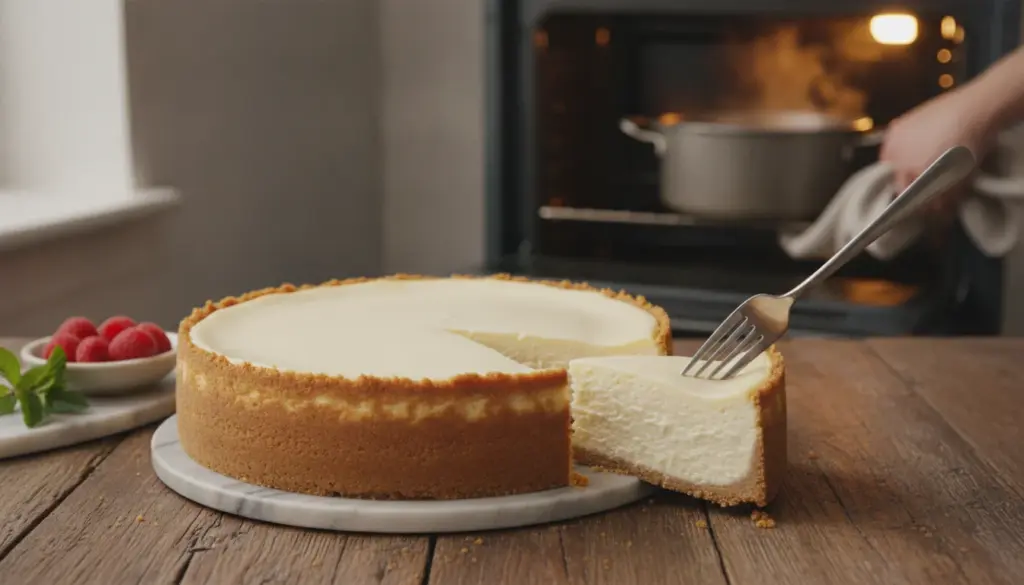
Are you tired of pulling a beautifully baked cheesecake out of the oven only to find an unsightly canyon running right through the middle? Achieving a flawlessly smooth, velvety texture doesn’t require luxury ingredients. Instead, it all comes down to managing moisture and oven heat with precision. In my experience baking these delicate desserts, just a handful of straightforward technical adjustments can transform a dense, heavy cake into a silky slice of perfection that yields effortlessly to your fork.
The Foundation: Crispy, Never Rock-Hard
Every great cheesecake relies on a bottom layer that holds its shape during slicing without requiring a hacksaw to cut through. You need to crush your dry biscuits until they resemble an incredibly fine powder. The goal is to add just enough melted butter to bind those crumbs together, avoiding an overly saturated mix that turns into a concrete slab once chilled.
If you are using a standard 22 cm springform pan, the sweet spot is roughly 200 g of biscuits mixed with 80 to 90 g of melted butter. When combined, this mixture should feel exactly like wet sand. Pressing it with a spoon should pack it tightly without any excess fat pooling on top. Gently push this crumb mixture slightly up the sides of your tin if you want a beautiful outer border, applying firm but careful pressure.
Next, pop your prepared crust into the refrigerator for a minimum of 20 to 30 minutes, or alternatively, pre-bake it for 10 minutes at 160 °C. Chilling or par-baking ensures your delicate cream cheese filling won’t lift the crumbs and create a messy swirl when poured.
The Heart of the Dessert: Balancing the Creamy Filling
A flawless filling strikes a delicate balance between structural stability and melt-in-your-mouth softness. While blending cream cheese, ground curd cheese, ricotta, or mascarpone offers wonderful flavor profiles, the true magic lies in harmonizing your fats, sugars, and eggs. An overly fatty batter yields a cloying taste, whereas too many eggs will leave you with a rubbery, pudding-like bake.
To craft a traditional New York-style cake, start with 600–700 g of room-temperature cream cheese, alongside 150–180 g of sugar and 3 whole eggs. Tossing in an extra egg yolk is an excellent trick to boost that luxurious, silky mouthfeel. Incorporating 100–150 g of Greek yogurt or sour cream introduces a bright tanginess that cuts through the richness and prevents a dense, pasty texture.
The blending sequence makes all the difference here. Always beat the cheese on its own first until every single lump vanishes. Introduce your sugar next, and save the eggs for the very end. Incorporate the eggs one at a time, folding them in with minimal agitation. Over-mixing traps air bubbles inside the batter, which will stubbornly puff up in the oven and collapse rapidly during cooling, leaving massive fissures behind.
Expert baking tip: Once your filling is safely in the pan, give it a few firm, flat taps against your kitchen counter. You will instantly notice trapped air bubbles rising to the top and popping, keeping your surface flawlessly smooth.
Mastering Temperature: Avoiding Thermal Shock
Nearly every visual and textural flaw in a cheesecake stems from sudden temperature fluctuations. It is absolutely critical that every single ingredient reaches room temperature before you begin mixing. Attempting to blend cold cream cheese, eggs, sour cream, or yogurt straight from the fridge often leads to a curdled, clumpy batter that bakes unevenly.
Treat your oven environment with just as much care. Maintaining a steady 150–160 °C on a static baking setting is your greatest asset for an even bake. Crank the heat any higher, and you risk scorching the outer edges while the center remains unpleasantly raw. Patience is vital, as this dessert needs to bake gently and will only fully set up as it cools down.
The Gentle Water Bath Method
Baking your cake in a water bath remains the most reliable strategy for guaranteeing an unblemished, smooth top. The surrounding hot water generates a highly humid microclimate, stopping the exterior edges from cooking dramatically faster than the delicate center.
For those using a springform pan, tightly wrap the outside base with heavy-duty aluminum foil halfway up the sides to block any moisture from seeping into the crust. Place your wrapped pan inside a wider roasting dish, carefully pour boiling water into the outer dish until it reaches halfway up the foil, and slide it into the oven. You will know it is ready when the edges look firm but the middle still wobbles slightly like gelatin. Pulling it out only when the center is rock solid guarantees a dry, overbaked result.
Proper Cooling: The Final Secret
Countless home bakers ruin a perfectly cooked dessert in the final few moments. Once you switch off the oven, leave the door propped open for 30 to 40 minutes using the handle of a wooden spoon. This gradual cool-down phase shields the cake from extreme drafts and prevents thermal shock.
Only after this resting period should you transfer the pan to a wire rack on your counter. Once it comes entirely to room temperature, chill it in the refrigerator for a minimum of 6 hours, though leaving it overnight is highly recommended. The extended chilling time compacts the crumb and dramatically deepens the flavor profile. Trying to slice it too early will simply leave you with a crumbly, unappealing mess.
Elevating Flavor with the Right Toppings
A subtly sweet cheesecake base pairs wonderfully with an array of garnishes, provided you pay close attention to their consistency. If you crave a fruity berry sauce, simmer strawberries or mixed forest fruits with a little sugar until slightly thickened, and let it cool completely before pouring. Slathering overly watery or warm compotes directly onto the surface will ruin your beautifully baked top layer and make it soggy.
When working with melted chocolate, always blend it with a splash of warm heavy cream to fashion a supple ganache. This ensures the topping won’t seize into an impenetrable shell once chilled. Ultimately, your finishing touches should provide a contrasting flavor profile and visual appeal without overpowering the delicate cream cheese beneath.
Avoiding Common Pitfalls During Flavor Experiments
Branching out into creative variations like zesty lemon, rich espresso, or roasted pistachio is incredibly rewarding, but you must respect the core recipe ratios. When introducing nut pastes or flavor extracts, keep a close eye on the overall moisture level. Should you mix in fresh citrus juices or a loose fruit puree, you must balance the batter by slightly reducing the amount of sour cream or yogurt used.
Achieving mastery relies heavily on three foundational pillars: a slow bake, eliminating sudden temperature shifts, and an extended chilling period. By rigidly following these rules, you can creatively tweak the taste profiles while preserving that breathtaking, melt-in-the-mouth texture that makes a homemade cheesecake truly unforgettable. Save these expert tips for your next baking session!