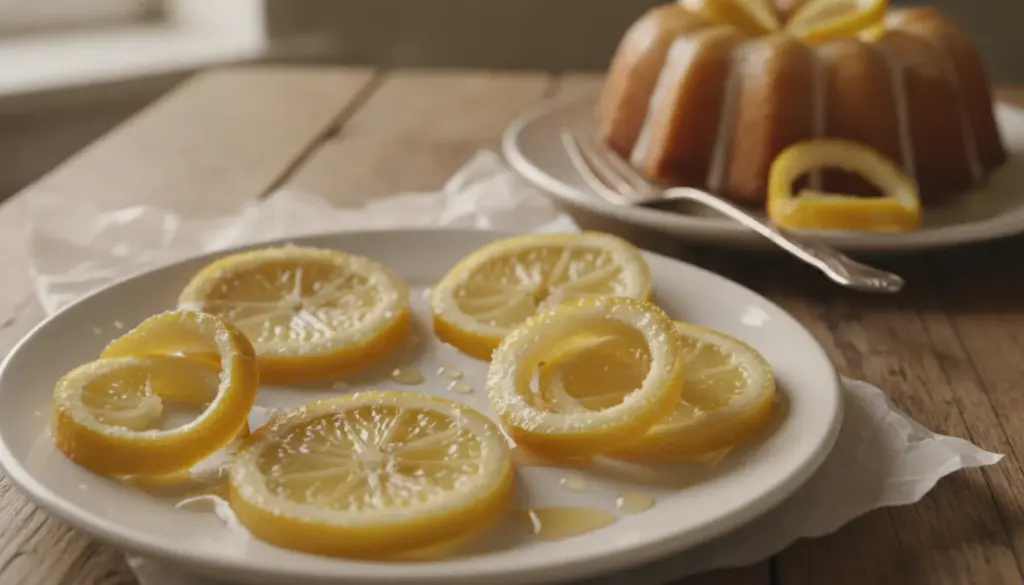
Have your DIY citrus treats ever turned into tough, bitter lumps that completely ruin a delicate cake? Achieving that brilliantly glossy, tender rind without a trace of harshness is the true secret to elevating your baking projects.
Instead of overpowering your pastries, beautifully prepared citrus will gently enhance their flavor profile. By mastering this reliable culinary technique, you can easily manage the preservation process. The final results will boast the taste and appearance of delights from a high-end Italian patisserie.
The Secret Lies in the Rind (and Your Preparation Technique)
Sourcing the right fruit dictates your ultimate success. Always seek out unwaxed lemons boasting a thick, fleshy exterior. Varieties with thinner skins usually disintegrate or turn unpleasantly fibrous during extended simmering.
Before you even touch the sugar, you need to tackle the albedo—that spongy, white, bitter layer lurking right beneath the surface. A quick rinse simply will not do the job. Slice your citrus into thick rounds or wedges, extract the seeds, and soak the pieces in cold water for several hours, being sure to swap out the water periodically.
This crucial step softens both the pulp and the exterior, allowing the sweet syrup to slowly infuse while completely eradicating any lingering bitterness.
Expert tip: To guarantee that sharp flavor vanishes entirely, prick the skin gently with a fork a few times prior to submerging them. This vastly accelerates the removal of those undesirable bitter compounds.
Reliable Ingredients and Foolproof Ratios
Crafting a flawless confection does not require fancy liqueurs or artificial extracts. The fundamental recipe for roughly four large fruits is wonderfully straightforward.
You will simply need:
- 4 unwaxed lemons (preferably thick-skinned)
- 500 g caster sugar
- 500 ml water
- Optional: 1 tablespoon of honey or liquid glucose (acting as your crystallization safeguard)
Relying on a 1:1 sugar to water ratio is remarkably easy to memorize. This specific balance produces a highly stable liquid that works its way deep into the fruit’s cellular structure, drastically lowering the chances of accidental scorching.
The Art of Slow Candying for Deep Infusion
Once your soaking phase concludes, boil the citrus chunks in fresh water for just a few minutes before draining them well. Combining this quick blanching with the prior soak ensures your final product stays wonderfully tender while maintaining its shape.
Next, prepare your sweet base by warming the water and sugar gently until the liquid turns completely clear. Drop in your blanched fruit and keep the stove on the absolute lowest heat setting. The liquid’s surface should barely quiver. Vigorous bubbling is the main culprit behind tough, hardened skins.
The most effective approach relies on staggered cooking. Simmer the pieces for 10 to 15 minutes, remove the pot from the burner, and let everything cool completely within the liquid.
Run through this exact cycle three to four times over a 24-hour window. Each resting phase allows sweetness to travel further inward, yielding a luscious, nearly translucent finish.
Steering Clear of Rubbery Rinds and Crystallization
Rushing the process or cranking up the heat causes most kitchen disasters here. To keep your treats from taking on the texture of a shoe sole, you must treat them gently.
Avoid stirring the liquid vigorously while it cooks. Instead, simply give the saucepan a gentle swirl from time to time. Should you spot grainy build-up along the inner edges, gently wash it away using a wet pastry brush dipped in hot water.
Always maintain a very low flame throughout the cooking cycles. If your mixture darkens rapidly, you are caramelizing rather than properly preserving the fruit.
Furthermore, never dry your finished pieces in a hot oven. If you prefer them less sticky, set your appliance to a mild 60–70°C or simply arrange them on a wire cooling rack for a few hours. Stirring a spoonful of honey into your pot also works wonders to stabilize the mixture and block hard crystals from forming.
Creative Culinary Applications: From Sweets to Savory
Commercially produced alternatives simply cannot match the vibrant, fresh aroma of your homemade creation. Diced into tiny cubes, these bright gems are the ultimate upgrade for panettone, moist yogurt loaves, or buttery shortbread biscuits.
Surprisingly, they also shine brightly in savory cooking. A tiny pinch of finely minced rind introduces extraordinary complexity to a fish tartare, a vegetable couscous, or a crisp fennel salad.
Try folding a little bit into a basic shrimp risotto, and you will instantly realize how this single addition transforms the entire plate.
Smart Storage Solutions for Everyday Convenience
For frequent bakers, simply keep the treats submerged in their cooking liquid inside the refrigerator. Tucked away in an airtight glass jar, they will remain fresh and flavorful for many weeks.
If you need them to last even longer, drain the pieces, toss them lightly in granulated sugar, and stash them in a dry, cool pantry.
You can also borrow a brilliant trick from professional pastry chefs: freeze small batches of pre-chopped rind. These frozen morsels can be tossed straight into your cake batter without any thawing required.
Having this intensely aromatic ingredient constantly at your fingertips makes it incredibly easy to turn an average dessert into an absolute masterpiece. Make sure to save this guide for your next baking adventure.