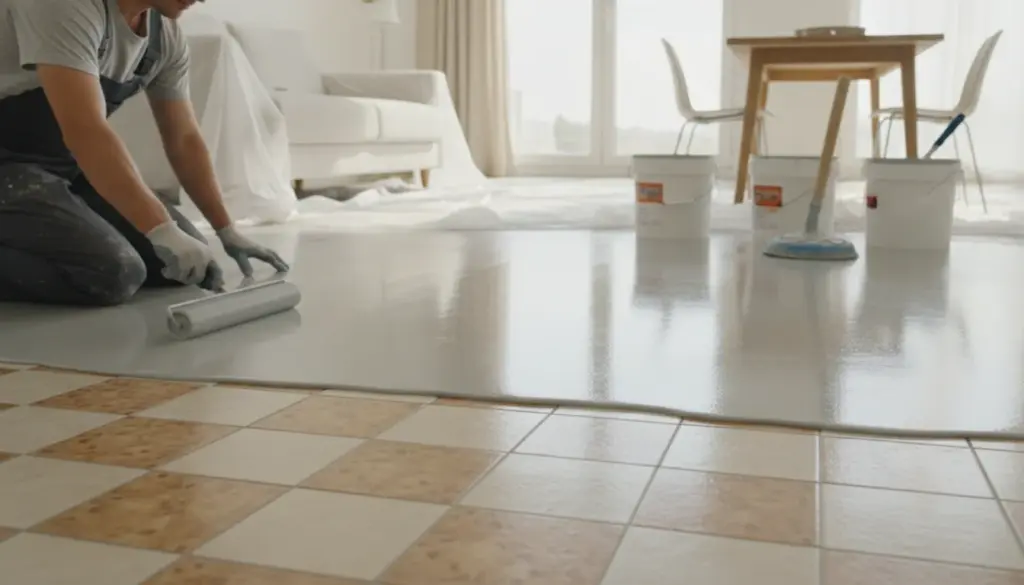
The Smart Alternative to Floor Demolition
Many of us know the feeling: your floor tiles are spotlessly clean, but they still scream 1990s. Yet, absolutely no one looks forward to days of heavy demolition and endless dust. Fortunately, as property renovation specialists often note, there is an incredibly clever alternative. You can simply apply a sleek new topcoat directly over your existing tile floor. It requires zero drilling, zero breaking, and leaves you with a flawless finish that looks like a brand-new installation.
Why Skip the Sledgehammer?
A traditional floor overhaul usually involves renting a dumpster, aggressively chipping away old ceramics, rebuilding the subfloor, and eventually laying down the new material. This tedious process eats up time, drains your budget, and creates massive noise pollution. It is especially frustrating if you just bought a home saddled with a dated museum-style floor that bothers you every single day.
Today, a far less invasive method is gaining serious traction. By spreading a specialized finishing layer right on top of those outdated tiles, you make grout lines vanish entirely. The surface transforms into one continuous, ultra-modern plane. Because the floor becomes completely seamless, dirt has nowhere to hide, making cleaning drastically faster. Plus, the smooth finish often feels remarkably pleasant under bare feet.
With just a thin layer of pourable liquid applied over those tired ceramics, you instantly modernize the entire vibe of your room. Generally, professionals rely on decorative resins, typically formulated from epoxy or polyurethane, to achieve this. The liquid resin levels itself across the old tiles and cures into a highly durable, watertight shield designed to last for decades.
How Decorative Resin Flooring Actually Works
This decorative material starts as a liquid, which is poured and distributed evenly across your prepared subfloor. Visually, the old grout joints disappear completely, yielding a tight, perfectly flat surface. By thoughtfully selecting the specific color and gloss level, you can completely redefine your home’s interior design.
Some of the most highly requested shades include:
- Warm sand and stone tones for a serene, natural atmosphere.
- Cool, crisp grays to achieve an edgy, industrial loft aesthetic.
- Pure white and off-white to maximize light reflection in smaller, darker spaces.
Resin flooring systems are typically available in matte, satin, or high-gloss finishes. For living rooms, a subtle matte or satin glow usually works best to hide footprints. In contrast, hallways and kitchens can handle slightly smoother finishes, provided you carefully consider slip resistance.
Perfect for Kitchens, Bathrooms, and Living Spaces
Because this specialized resin layer is fully waterproof and surprisingly scratch-resistant, it thrives in almost every room of the house, including high-moisture zones like bathrooms and toilets. In culinary spaces, the sheer ease of maintenance is a massive advantage. You will never again have to scrub grease or food particles out of stubborn grout lines, and the moisture-proof surface easily withstands daily wear and tear.
For wet environments, installers can mix in specialized texturing agents to provide extra grip, ensuring the floor never becomes dangerously slippery when wet. Conversely, in a cozy living area, you might opt for a silky, subtly reflective topcoat that bounces natural light around the room, instantly elevating the sense of luxury.
When finished correctly, a seamless resin floor looks just as spectacular in a rugged urban loft as it does in a bustling family home filled with kids and pets.
Crucial Conditions for Your Existing Floor
Before you even think about mixing a single drop of resin, your current tile floor must meet a few critical structural requirements. This is exactly where many enthusiastic home improvers make costly miscalculations.
An aging tile base suffering from loose sections, deep cracks, or shifting elements demands thorough repair first. If you skip this vital stabilization step, the flexible resin layer will eventually absorb those structural movements, inevitably leading to ugly surface cracks down the line.
Step-by-Step: The Resin Makeover Process
A professional resin installation always follows a strict sequence of events. While highly skilled DIYers might tackle portions of this themselves, the preparation phase should never be underestimated.
1. Deep Cleaning and Degreasing
First, clear all furniture from the room and scrub the floor meticulously. Any lingering grease, soap scum, or old wax polish will ruin the resin’s adhesion. Industry experts usually recommend a strong degreaser, hot water, and heavy mechanical scrubbing. Afterward, the surface must dry completely.
2. Repairing and Leveling
Any loose tiles must be securely re-glued or entirely replaced. Next, deep grout lines and minor surface damages are filled in to prevent noticeable grooves from showing through. The ultimate goal is a perfectly flat, rock-solid base that can flawlessly support the new material.
3. Applying the Primer Coat
Highly glazed or incredibly smooth tiles usually require a specialized bonding primer. This crucial adhesion layer ensures the liquid resin bites firmly into the smooth ceramic, preventing future peeling or flaking.
4. Mixing and Pouring the Resin
Most high-quality resins utilize a two-component system that must be mixed precisely right before application. Once combined, the clock is ticking; you have a very limited time window to work with the product. Using a specialized roller, trowel, or squeegee, the thick liquid is spread evenly. In larger spaces, avoiding visible overlap marks and color inconsistencies requires a practiced, steady hand.
5. Curing and Final Finishing
After pouring, the new floor needs sufficient time to cure and harden. During this critical window, the room is strictly off-limits. Depending on the specific product chemistry and room temperature, curing can take anywhere from 24 hours to several days. Often, a final transparent topcoat is rolled on to provide enhanced wear resistance or added texture.
Cost Analysis: DIY vs. Hiring a Professional
For compact areas like a small guest toilet, utility room, or modest bathroom, complete do-it-yourself resin kits are readily available. These beginner-friendly packages typically start around 18 euros per square meter for the raw materials, depending on the brand and desired finish. However, this assumes your subfloor is already in pristine condition; if you need extra leveling compounds and primers, that price will quickly climb.
If you choose to hire a specialized flooring contractor, expect total project costs to hover between 100 and 150 euros per square meter. This premium price tag covers meticulous preparation, high-end materials, and skilled labor. The exact rate fluctuates based on spatial complexity, custom color choices, anti-slip additives, and premium topcoats.
While a professional installer requires a larger upfront investment, they consistently deliver a vastly superior, perfectly tight surface with virtually zero risk of roller marks, trapped air bubbles, or patchy colors.
Common Pitfalls and How to Avoid Them
Those who attempt this as a weekend renovation project frequently stumble into a few classic traps. Some of the most notorious mistakes include:
- Rushing the preparation: Failing to properly degrease and remove all dust.
- Ignoring the clock: Applying the mixed resin after its strict processing time has expired.
- Climate control issues: Working in unusually cold or rapidly fluctuating room temperatures, leading to uneven curing.
- Forgetting clearances: Failing to account for the slight increase in floor height near doors and baseboards.
Although a resin overlay is incredibly thin, it can add just enough millimeter height to cause doors to scrape or create awkward thresholds. Taking precise measurements beforehand and trimming door bottoms if necessary will save you a lot of frustration later on.
Expert Tips on Comfort, Heating, and Upkeep
A poured resin floor visually appears much sleeker and can sometimes feel a touch cooler than natural wood or luxury vinyl, though this varies by exact product formulation. However, when paired with underfloor heating, this ultra-thin finishing layer performs magnificently. The gentle heat distributes perfectly evenly, and the minimal thickness ensures almost zero thermal energy is wasted. Of course, your original tiled floor must already be equipped with a functional heating system for this to work.
When it comes to maintenance, a simple routine of regular vacuuming and occasional mopping with a gentle, pH-neutral cleaner is all you need. You should completely avoid harsh chemical solvents, abrasive scouring powders, and aggressive degreasers, as these will gradually dull the protective topcoat. For busy households with energetic dogs or small children, selecting a matte or satin finish is a smart move, as it easily conceals superficial micro-scratches.
If you are still on the fence, consider testing the waters in a small, low-risk area like a hallway or a half-bathroom. This allows you to experience the material’s unique feel and simple maintenance firsthand without fully committing your entire home. If you fall in love with the result, your kitchen and living room make perfect next steps for creating a beautifully cohesive, highly modern living space.